
A motherboard’s CPU debug light functions similarly to a warning light on your car’s dashboard. It tells you that there’s a problem with the CPU. When this light comes on, it means that the computer can’t talk to the CPU properly, so it won’t be able to start up or work right. There are some possible reasons why this might happen.
So, how to fix CPU debug light?
What is a CPU debug light?
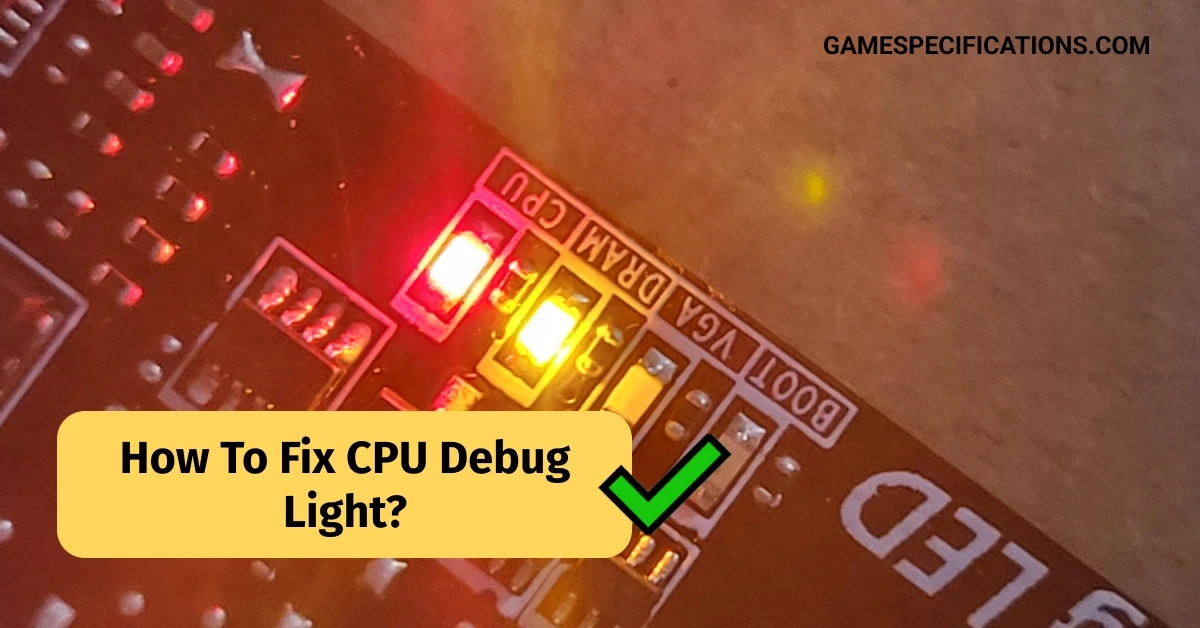
The CPU debug light, often called the CPU EZ Debug LED, is a useful feature on many motherboards, especially those made by MSI (Micro-Star International). It’s like a diagnostic tool that helps you figure out what’s wrong when your computer is having trouble starting up. The CPU debug light is made up of four lights labeled CPU, DRAM, VGA, and BOOT. These lights are usually near the 24-pin power connector or along the edge of the motherboard. When you turn on your computer, these lights will turn on one after the other, or they might stay on, depending on whether the corresponding component is working properly or not.
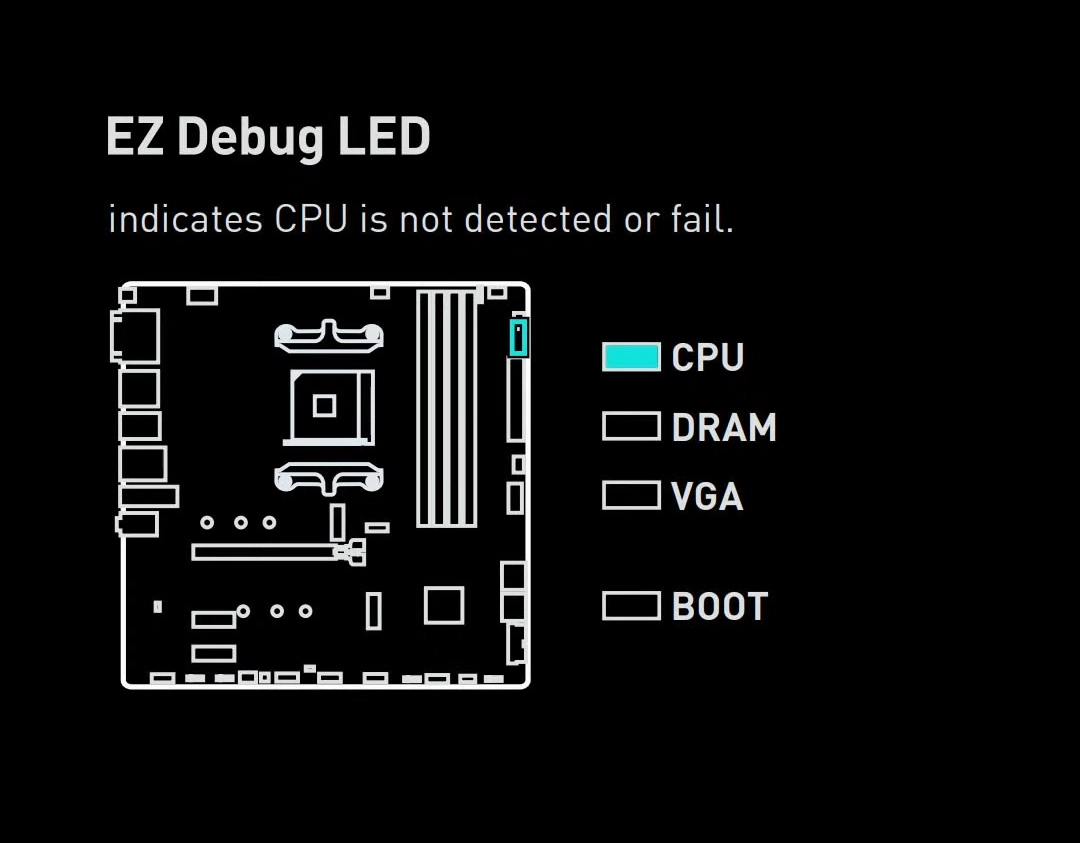
The CPU debug light specifically tells you if there’s a problem with the CPU or its socket. If the CPU debug light stays on, it’s possible that the CPU itself, its power supply, or the motherboard’s CPU socket are damaged.
What purpose does the CPU debug light serve?
When there’s an issue with the CPU, the CPU debug light on your motherboard serves as a warning signal. This indicator light illuminates when the computer struggles to communicate with the CPU, preventing it from booting up or functioning properly.
The CPU debug light plays a crucial role in helping you identify and resolve CPU-related issues. Alerting you to a potential problem prevents further CPU or other components damage. Additionally, it helps slim down the source of the issue, making troubleshooting more efficient.
Here are some of the advantages of having a CPU debug light on your motherboard:
- Prevents damage to the CPU and other components
- Simplifies troubleshooting CPU-related problems
- Slims down the source of the issue
- Saves time and money by avoiding unnecessary repairs
What could be the issue with your CPU debug light?
- Improper CPU Installation: The CPU may not be properly seated or secured in the motherboard’s CPU socket, causing communication issues.
- Damaged CPU Pins: The delicate pins on the CPU might be bent, warped, or otherwise damaged, disrupting electrical connections.
- Faulty CPU: The CPU itself may be malfunctioning due to a manufacturing defect or damage incurred during handling or installation.
- Motherboard Issues: Problems with the motherboard’s CPU socket, such as damaged pins or faulty circuitry, can prevent proper communication with the CPU.
- Insufficient Power Supply: An inadequate or malfunctioning power supply unit (PSU) might not provide sufficient power to the CPU, causing it to fail to function properly.
How to fix CPU debug light?
Troubleshooting the CPU debug light involves checking various components and connections to identify the root cause of the issue. Here’s how to fix CPU debug light:
Step 1: Check CPU Installation
- Turn off the computer and unplug it from the power outlet.
- Open the computer case and locate the CPU.
- If the CPU is not properly seated, carefully remove it from the socket and reseat it.
- Make sure the CPU is properly aligned with the socket and that the locking mechanism is engaged.
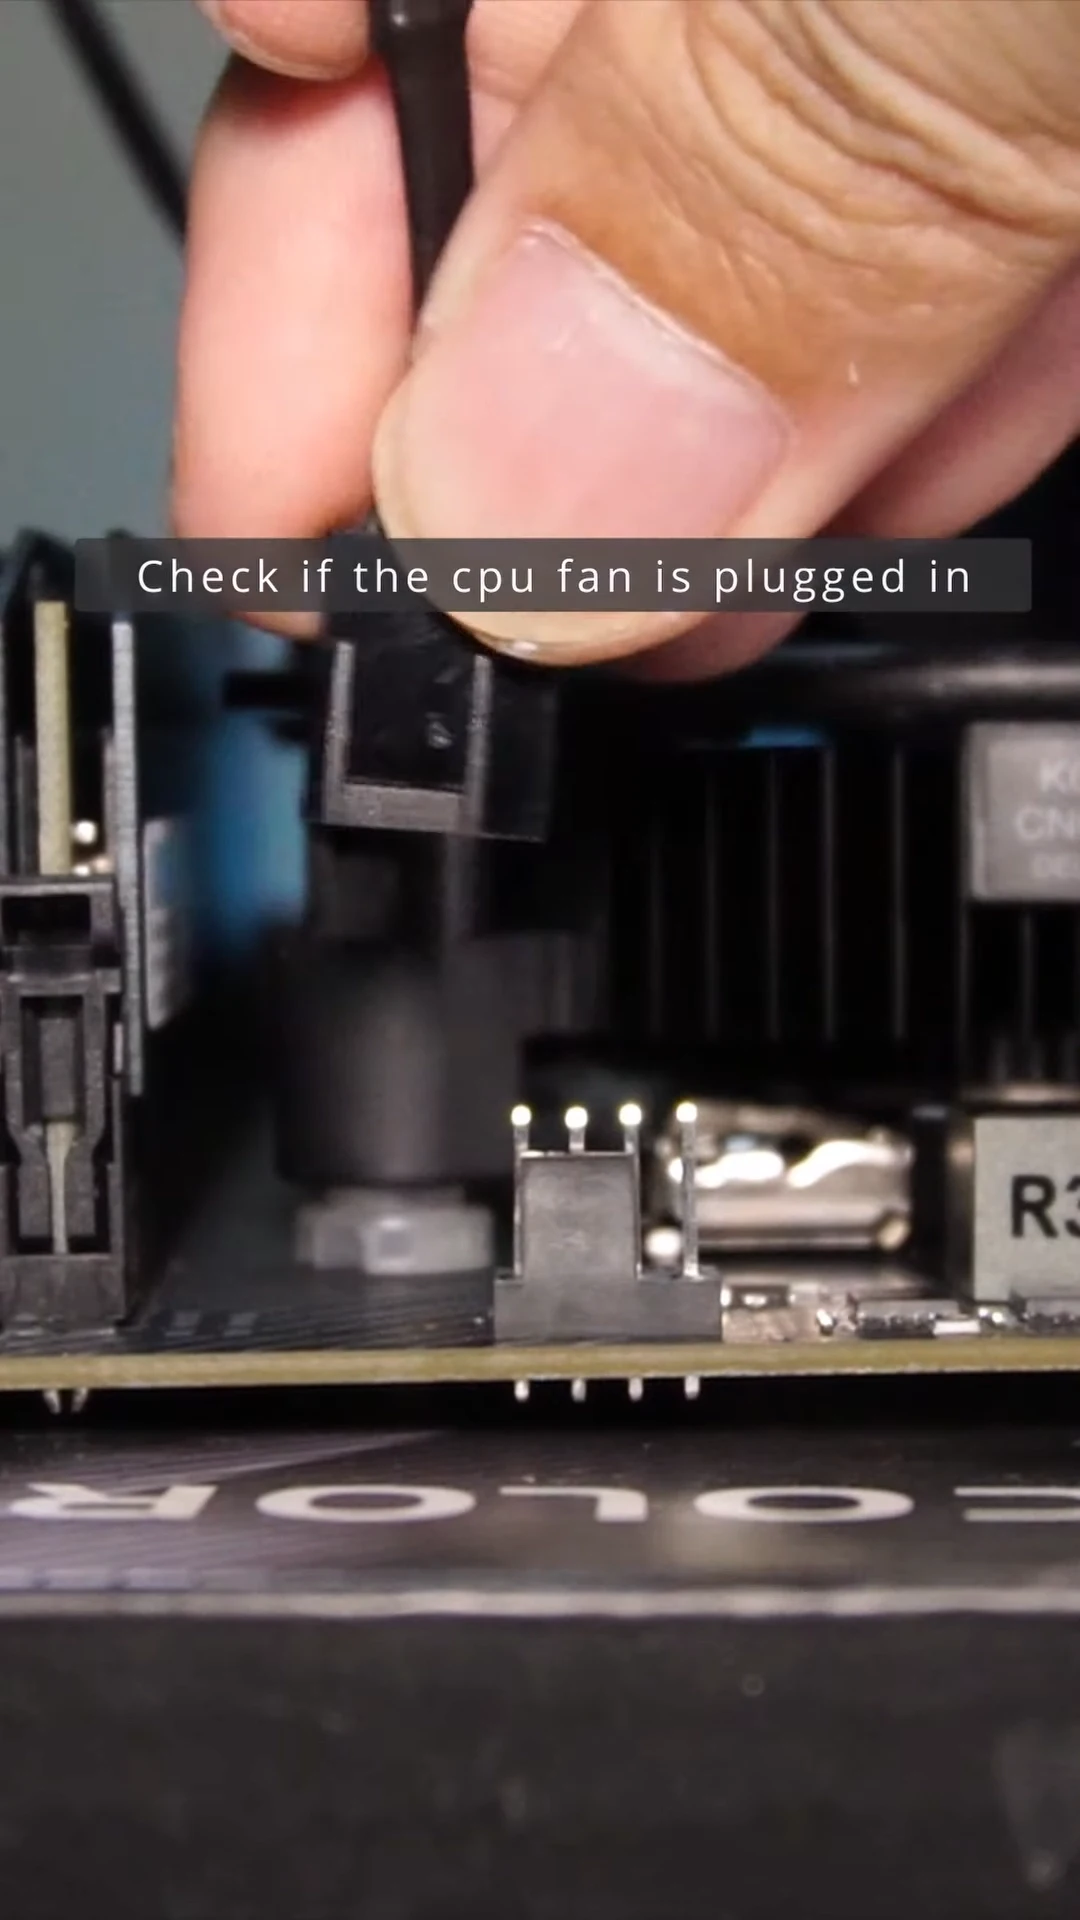
Step 2: Verify CPU Power Connection
- Check if the CPU power connector from the PSU is securely plugged into the motherboard’s CPU power socket.
- This connector is typically a 4-pin or 8-pin connector located near the CPU socket.
- Ensure the connector is firmly plugged in and that there are no loose connections.
Step 3: Inspect CPU Pins and Sockets
- Carefully examine the CPU pins and the motherboard’s CPU socket for any damage or debris.
- Clean the pins and socket with a lint-free cloth and compressed air.
- Look for pins that might be bent or damaged. If any pins are not right, straighten them using a pair of tweezers.
- Check for debris or damaged pins in the motherboard’s CPU socket. If necessary, clean the socket with a lint-free cloth and compressed air.
Step 4: Reset CMOS
- Reset the CMOS (Complementary Metal-Oxide Semiconductor) settings to clear any BIOS-related errors that might be causing the CPU debug light.
- You can also ee your motherboard’s handbook/manual for details on how to perform a specific CMOS reset.
- Resetting the CMOS will restore the BIOS settings to their default values.
Step 5: Try a Different CPU (if available)
- If possible, test the motherboard with a different CPU to rule out a CPU-related issue.
- This can help in identifying whether the motherboard’s CPU socket or the CPU itself is the source of the issue.
Step 6: Test PSU with Another System
- Use a known-working PSU to power the system.
- If the CPU debug light persists, the PSU might be faulty.
- Replace the PSU with a compatible and functioning unit to resolve the issue.
If the issue persists after trying the above steps, consider seeking assistance from a qualified computer technician for further diagnosis on how to fix CPU debug light and repair.
The video by Mac Coyzkie here also provides a good guide on how to fix CPU debug light. You can also try going through MSI gaming’s Reddit thread here, where people have talked about how they fixed this issue.
Hope we helped and now you know how to fix CPU debug light.
Other Errors You Might Be Interested In
Pc Turns On But The Keyboard Mouse And Monitor Don’t Work
5950X 90c: Is the AMD processor heating up? Here’s How You Can Fix It